📹 Video Walkthrough
Prefer to watch instead of read? The video above covers everything in this article from start to finish.
Welcome to Candid Career+! This guide will walk you through everything you need to know to get up and running with your platform. By the end, you'll understand how to navigate the Admin Dashboard, publish and manage content, customize your platform, and set up key features like menus, communities, and user accounts.
💡 Good to know: Candid Career+ is built on uConnect technology, which means you have the option to expand your platform's functionality into a full virtual career center down the line. This guide focuses on the core features available to you right now.
Table of Contents
- Your Platform's Front End
- Logging In and the Admin Dashboard
- Support Resources
- Navigating the Admin Dashboard
- Publish: Adding Videos and Resources
- The Tagging System
- Engage: Emails and Subscribers
- Analyze: Platform Data
- Customize: Branding and Banners
- Menus
- Manage: Communities and Content Categories
- Widgets
- Users and Permissions
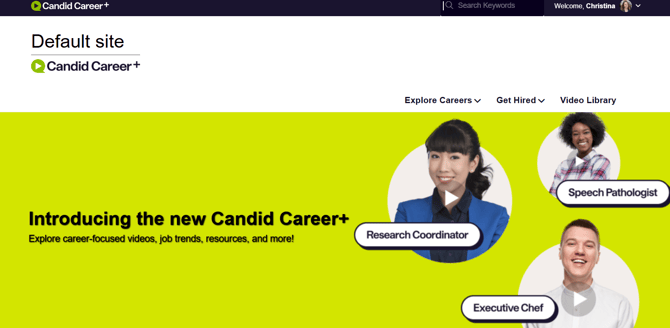
1. Your Platform's Front End
When students (and you!) land on your Candid Career+ homepage, they'll see:
- A Primary Navigation menu at the top for browsing content
- A Search bar to find any video on the platform
- A Login / Sign Up option so students and staff can create accounts
- Your platform's branding — which can be customized with your institution's logo, colors, and fonts
Want to customize your branding? You can add your institutional logo, update fonts and colors, and make the platform feel like your own. Submit a support ticket!
2. Logging In and the Admin Dashboard
As a platform admin, use the Login button on your homepage to access your account. If it's your first time, click Sign Up to create your account.
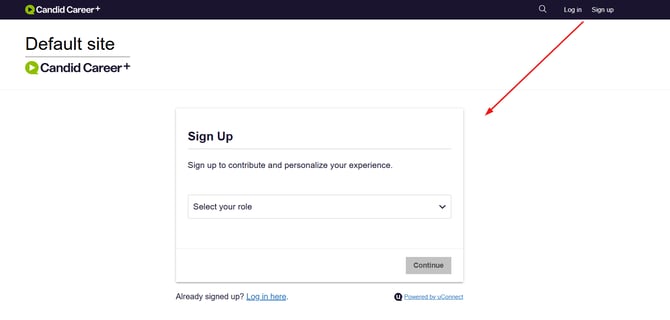
Once logged in, you'll be taken to the Admin Dashboard, your central hub for managing everything in your platform.
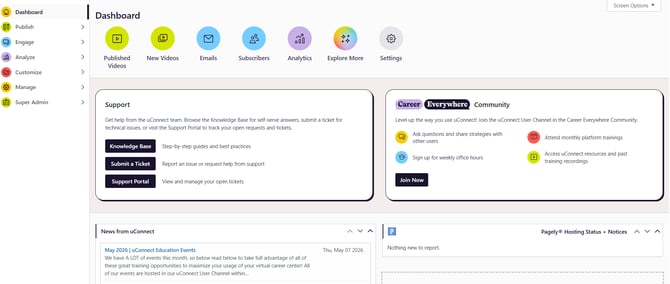
3. Support Resources
Before diving in, it's worth knowing where to get help. Right in the middle of your Admin Dashboard, you'll find two important resources:
Knowledge Base
Click Knowledge Base to search for how-to articles and videos on any platform topic. You can also chat with uConnect Assist for customized guidance — and if it can't answer your question, it will connect you with the support team.
Submitting a Support Ticket
Need help from the team? You can submit a ticket two ways:
- From the Knowledge Base — click Submit a Ticket in the top right corner
- From the Admin Dashboard — click the Submit a Ticket form link
When submitting, choose the most relevant topic from the dropdown (e.g., select Platform Branding for logo/color update requests). Not sure? Just select Other.
Once submitted, log into the support portal to track your ticket's status.
Career Everywhere Community
This is a free resource available to all uConnect customers!
Use it to:
- Connect with other Candid Career+ users
- Attend live weekly trainings and office hours
- Access past recordings and additional resources
4. Navigating the Admin Dashboard
The left-hand sidebar of your Admin Dashboard contains all the main sections you'll use. Here's a quick overview:
|
Section |
What It's For |
|---|---|
|
Publish |
Add videos and resources to your platform |
|
Engage |
Set up emails, manage subscribers, build forms |
|
Analyze |
View platform performance data |
|
Customize |
Update banners, front page settings, and menus |
|
Manage |
Edit community pages, content categories, and users |
Each section is covered in detail below.
5. Publish: Adding Videos and Creating Pages
The Publish section is where you add content to your platform.
Videos
Click Publish > Videos to add video content. You have two options:
- Upload your own video if your team has created original content
- Import from the External Content Library — a curated library of nearly 2,000 videos you can browse by keyword or by content partner
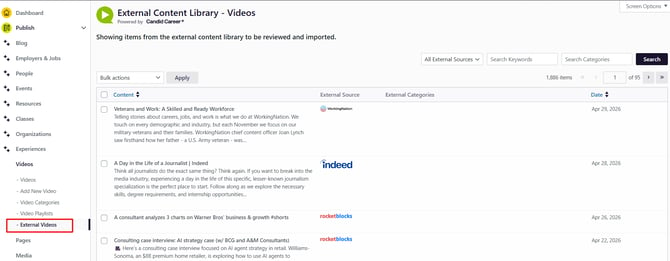
To import a video from the library:
- Search by keyword (e.g., "resume")
- Browse results and click Review to preview the video from its original source
- Click Import Content — the video will be automatically formatted for you
- Tag the video (see Section 6 below)
- Scroll to the bottom and click Publish
- Click View Post to verify it appears correctly on the front end
Landing Pages
You can also create custom landing pages for unique purposes — like a team page, an outcomes page, or a resource hub. Click Publish > Add a Page to get started and use the Block Editor to build it out.
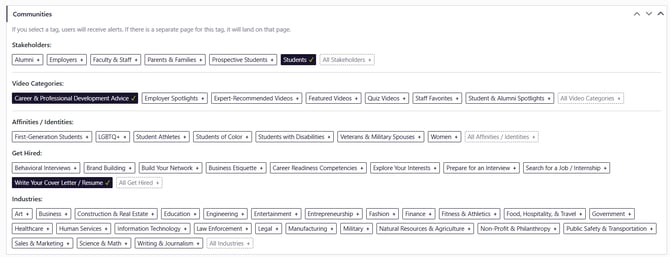
6. The Tagging System
Tagging is one of the most important concepts to understand. Tags tell your platform where to display content and who it's for. Proper tagging ensures students can find what they need.
Every time you publish a video or resource, you'll tag it across three categories:
Tag Category 1: Stakeholder (Audience)
Who is this content for?
Select the user type(s) this content is intended for — for example, Students, Alumni, or Employers.
Tag Category 2: Content Type
What type of content is this?
Select the category that best describes the content — for example, Career and Professional Development Advice.
Tag Category 3: Topic/Location
Where should this content appear on the platform?
Select the page(s) where this content should show up — for example, Write Your Cover Letter and Resume or All Industries.
⚖️ Tagging tip: Strike a balance — don't over-tag (it dilutes specificity and personalization) and don't under-tag (your content may not be visible or discoverable). Use your best judgment about what's most relevant.
Editing and Adding Tags
You can edit existing tags or add new tags at any time from your platform. If you notice a tag is missing or needs to be renamed, you don't have to submit a ticket — it's something you can manage directly.
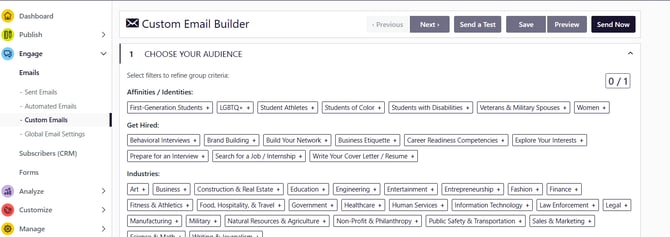
7. Engage: Emails, Subscribers and Forms
The Engage section is for managing your platform's email and communication features. These are optional but powerful if you want to stay in touch with students.
Key capabilities include:
- Email builder — create a custom newsletter or one-off email campaign
- Automated emails — send curated content to students based on their profile interests
- Subscriber management — upload lists of students or staff you want to email
- SIS Integration — set up a student information system sync
- Custom forms — build forms from scratch, like a student spotlight form or employer interest form
💡 Want to go deeper? The uConnect Academy (yellow graduation cap, top right) has an entire section dedicated to Engage. There's also a Platform Power Hour recording in the Career Everywhere community focused entirely on this section.
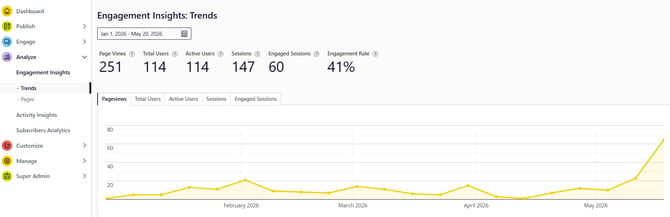
8. Analyze: Platform Data
The Analyze section shows you how your platform is performing.
- Overview dashboard — track key engagement metrics across a custom date range
- Pages — see your top-performing content
- Activity Insights and Subscriber Analytics — optional deeper dives into engagement
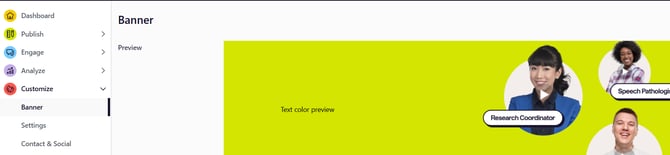
9. Customize: Branding and Banners
The Customize section gives you control over the look and feel of your platform's front end. From here you can:
- Update the homepage banner — swap out the default Candid Career banner for your own image
- Add an announcement banner — surface timely information for visitors
- Add office information — including hours, social media links, and more
- Manage menus — see Section 10 for a full walkthrough
10. Menus
Menus control the navigation that students see on your platform's front end. You can edit all of your menus!
To make changes, go to Customize > Menus.
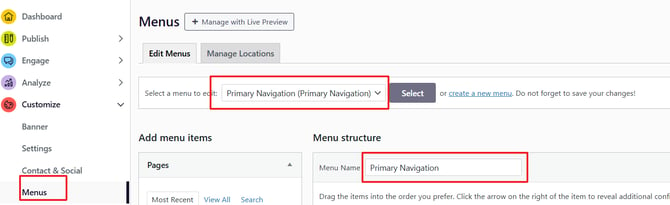
Key things to know:
- Make sure Primary Menu is selected in the dropdown before making any edits
- Each block represents a menu item — you can open items to view details, reorder them by dragging, or remove them
- To add a new menu item, you can link to:
- A custom external URL
- A page within your platform
- A Community
- To make a menu item a dropdown item, drag it slightly to the right beneath a parent item — it will indent automatically
⚠️ Important: Always click Save Menu when you're done. Changes do NOT auto-save.
⚠️ Do NOT uncheck Primary Menu in the Menu Settings — this will hide your menu from the front end. Leave menu settings as-is; they are managed by the support team on your behalf.
11. Manage: Communities and Content Categories
The Manage section is where you edit the pages and organizational structure of your platform.
Communities
Communities are the pages on your platform's front end. Go to Manage > Communities to find and edit them.
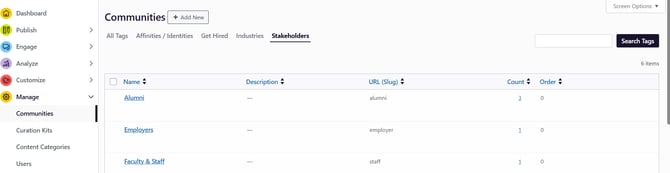
Stakeholder Communities (like Students, Alumni, Employers) are also the user types that can create accounts in your platform. You can:
- Rename stakeholders (e.g., rename "Students" to "Undergraduate Students" and add a new "Graduate Students" community)
- Add new stakeholder communities
- Hide stakeholders so they don't appear as sign-up options or front-end filters
- Note: Alumni, Employers, Faculty & Staff, and Students are hard-coded and cannot be deleted
Front-facing community pages (like "Write Your Cover Letter and Resume") can be edited by searching for them in the search bar. Within each community, you can:
- Change the page name
- Edit the description text
- Update the header image or image layout
- Change the URL (use caution — changing the URL will unlink the page on the front end and treat it as a new page)
- Adjust visibility settings
- Use the WordPress Block Editor to add more dynamic content like accordions, buttons, or embedded content (optional)
💡 To edit videos on a community page, go to Publish > Videos. To edit the hero navigation buttons (like "Most Recent Videos"), go to Customize > Menus and look for the Hero Navigation menu.
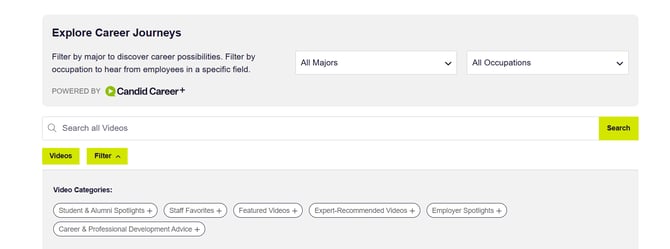
Content Categories
Content categories are the labels applied to your videos and resources. Think of them as the "what type is this?" layer that complements communities (the "where does it appear?" layer).
- Resource Categories — labels for the types of resources in your platform
- Video Categories — labels for the types of videos in your platform
You can add, edit, or hide categories at any time. Keep in mind: students can see these categories as filters in the video library unless you hide them.
12. Widgets
Widgets are pre-built content sections that appear on your community pages — like a "Most Recent Videos" feed or a "Videos by Career Title" section.
To identify widgets on your platform:
- Log into your platform
- In the black toolbar at the very top of the screen, check the box for Show Widget IDs
- Sections on your pages will now display their widget labels (e.g., "UC Video Pop-Up Widget #2")
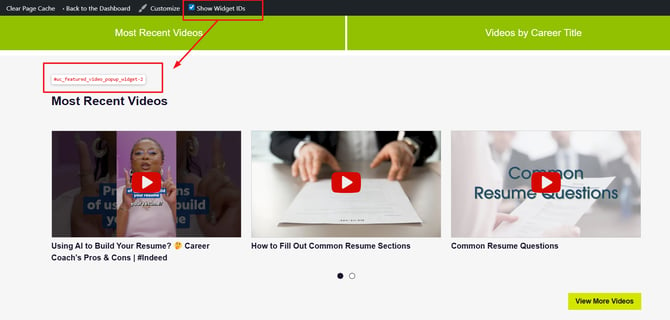
Important things to know about widgets:
- You cannot move or delete widgets yourself — submit a support ticket if you need a widget repositioned or removed
- The hero navigation buttons at the top of a community page act as anchor links to widgets below — they help users jump to relevant content sections on longer pages
- Those buttons don't have to link to widgets — you can also point them to any external URL (like an admissions page)
Read this important guide on all things widgets!
13. Users and Permissions
Go to Manage > Users to manage who has access to your platform and at what level.
User Roles
|
Role |
Description |
|---|---|
|
Member |
Typically students; no editing access |
|
Staff |
Content contributors; can publish content |
|
Community Expert |
Can submit content for review (appears in Publish as "Pending") |
|
Admin |
Full access — can edit community pages, content categories, menus, and publish content |
Learn more about the details of permission levels in this article!
Managing Users
To edit, remove, or reset a user's password:
- Search for the user in the search bar
- Hover over their account to see quick options
- Or click into their profile for full editing options
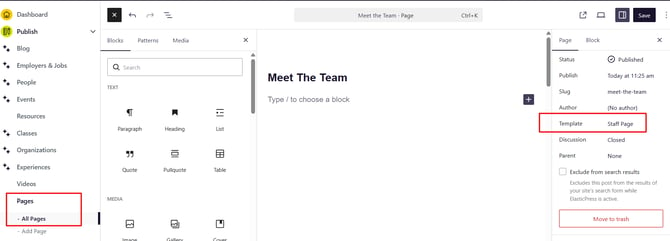
Building a Staff/Team Page
Want to showcase your career center team on the platform? Here's how:
- Make sure all team members are added as users first
- Go to Publish > Add a New Page, name it (e.g., "Meet the Team")
- In the right-side settings, select the Staff Page Template
- Click Publish, then refresh the page — the template will load
- Search for and add your team members, drag to reorder, and click Save
- Copy the page URL and add it to your menu so students can find it
Learn more with these articles:
- Staff Page Template and other Page Templates
- Add and remove users from Staff Page
- Add a page to a menu

What's Next?
Great work getting familiar with your Candid Career+ platform! Here are some recommended next steps:
- ✅ Complete the Block Editor Training in the uConnect Academy (Course C — ~30 min)
- ✅ Explore the Engage section via the Academy or Career Everywhere community recordings
- ✅ Submit a branding request if you'd like your logo and colors added
- ✅ Join the Career Everywhere community for free peer support, live trainings, and office hours
- ✅ Submit a support ticket anytime you need help — we're here for you!
Still have questions? Visit our Knowledge Base, chat with uConnect Assist, or submit a support ticket.