Within your uConnect platform, you can gain subscribers in three ways. The first is through organic user sign-ups, the second is through an automated integration (SIS) with your institution's user data system, and the third is through uploading a subscriber list into your platform.
Subscriber lists don't have to just be lists of your students; they can be lists of your employer contacts, parents and families, faculty and staff, and essentially anyone that you want to 1) be able to log into an account in your uConnect platform, and 2) anyone that you want to be able to send uConnect email communications to them.
Remember, your platform is designed to be open-access to all stakeholders so that a user could still view your content without being a subscriber. That being said, subscribers allow you to proactively communicate with your audience making them a valuable part of your marketing and engagement toolkit.
What you can do with subscriber list uploads:
-
Add or replace new students, employers, faculty, staff, etc. into your Subscribers section to receive email content
-
Update or remove tags associated with subscribers of the above stakeholder groups so that they can receive different email content
-
Delete any of the above subscribers so they no longer receive emails
In order to take any of these actions, you will need to have a properly formatted .xls, .xslx or .csv file to upload into your platform. Read on to learn how to format your file before you upload it into your platform!
Below is the minimum information we need to any subscribers. The file needs to be in CSV format, and must include the following headers:
-
FIRST_NAME
-
LAST_NAME
-
EMAIL
Note: If you only want to upload email addresses for a subscriber list, you still need to include a "First Name" and "Last Name" column in your file but you can leave them blank and just map to them during the upload process.
SSO ID Field: if you have SSO enabled and you are adding subscribers who would be logging in using their university credentials, then you will want to include this as a column in your subscriber file.
How to Format your Subscriber File
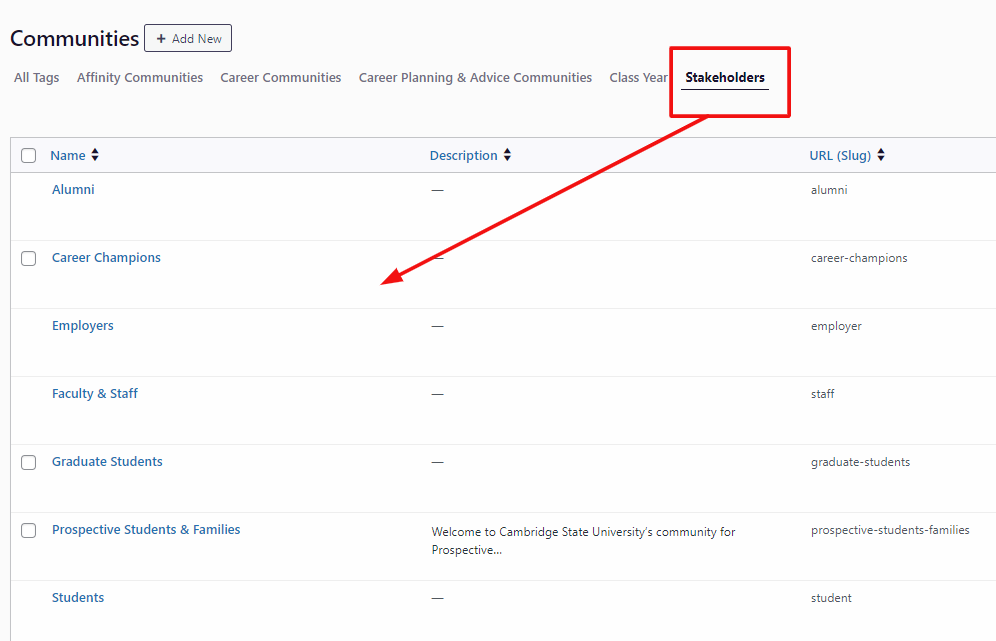
1. Determine the Stakeholders for your subscriber list.
You are able to upload multiple subscriber types within one file or a singular subscriber type. This means you could upload a list that contains both Students and Alumni, but you can only upload subscribers whom you already have existing Stakeholder communities for in your platform. These are also the user account types that new users can choose to create a new account in your platform.
You can view what Stakeholder types you can upload subscriber lists for by referring to your Audience/Stakeholder Communities under Manage>Communities. See below:
In any file where you are uploading multiple subscriber types, you will need to include a column in the file that includes the subscriber type for each subscriber. For example, if you were uploading a file of students and alumni, you would need a Stakeholder column, and to indicate in each row who was a student and who was an alumni.
2. Add required fields.
A basic subscriber list only needs 3 columns:
- First name
- Last name
- Email address
However, if your uConnect platform has SSO enabled and the subscribers you are including in the list will be logging into uConnect using SSO, then you must include "SSO ID" as a column and provide that information.
If you are adding student subscribers, you will also need "Graduation Year" as a column, and the graduation years in your column must be in a 4-digit year format, such as 2026. We do not support other formats.
Optional if uploading student subscribers: If you need a sample template, you can use this template to begin formatting your Subscriber List with the required columns, but remember, this template is intended for automated student subscribers/SIS. Please read this article if you want to set up automated subscriber uploads for your students.
3. Add optional fields.
Within your spreadsheet, you can add as many columns as you like that correspond to a Community Group within your platform. This is optional, but allows you to pre-subscribe a subscriber to a Community.
First, check what Community Groups you have under your Manage>Community section of your admin dashboard to see what options you can map to:
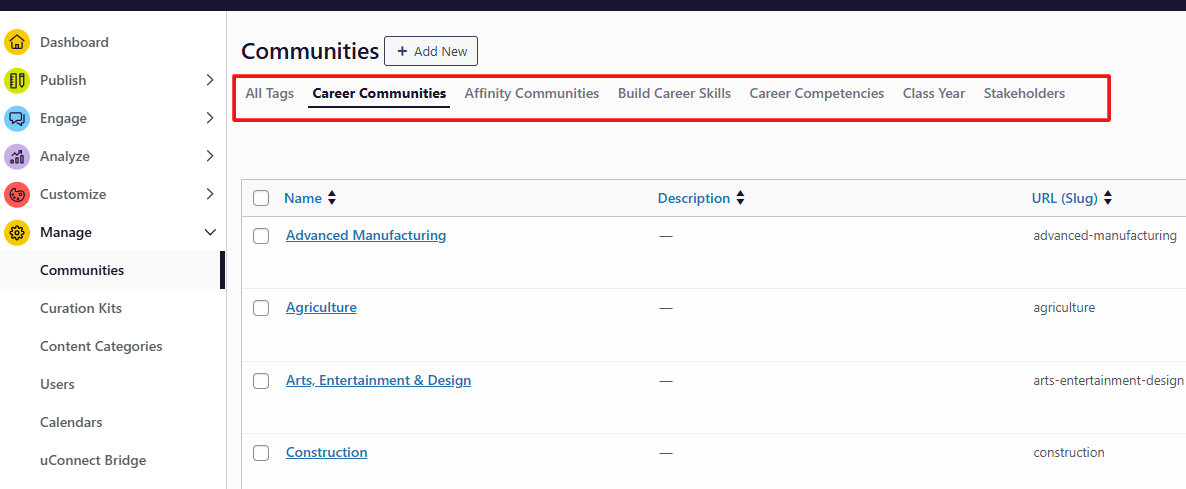
For example, if you wanted to pre-subscribe your students to a relevant Career Community, you would want to include a column for your Career Community Group. In that column, to then include Community data, you would indicate that subscriber's corresponding Career Community, such as 'Finance' or 'Marketing', in their row of user information.
If there are multiple Communities that you would like to subscribe someone to within the same Community Group, those can be separated by semicolons. If you would only like to pre-subscribe certain users, you can leave any row under the column blank.
Example:
|
Career Community |
Affinity Group |
College |
|
Arts, Entertainment & Design |
First Gen; Military |
College of Engineering |
Lastly, if you are uploading a student or alumni file and would like to include Graduation Date, this must be in a four-year format, such as 2025, and not as a specific date, such as June 2025 or 6/2025.
4. Download your file and start uploading.
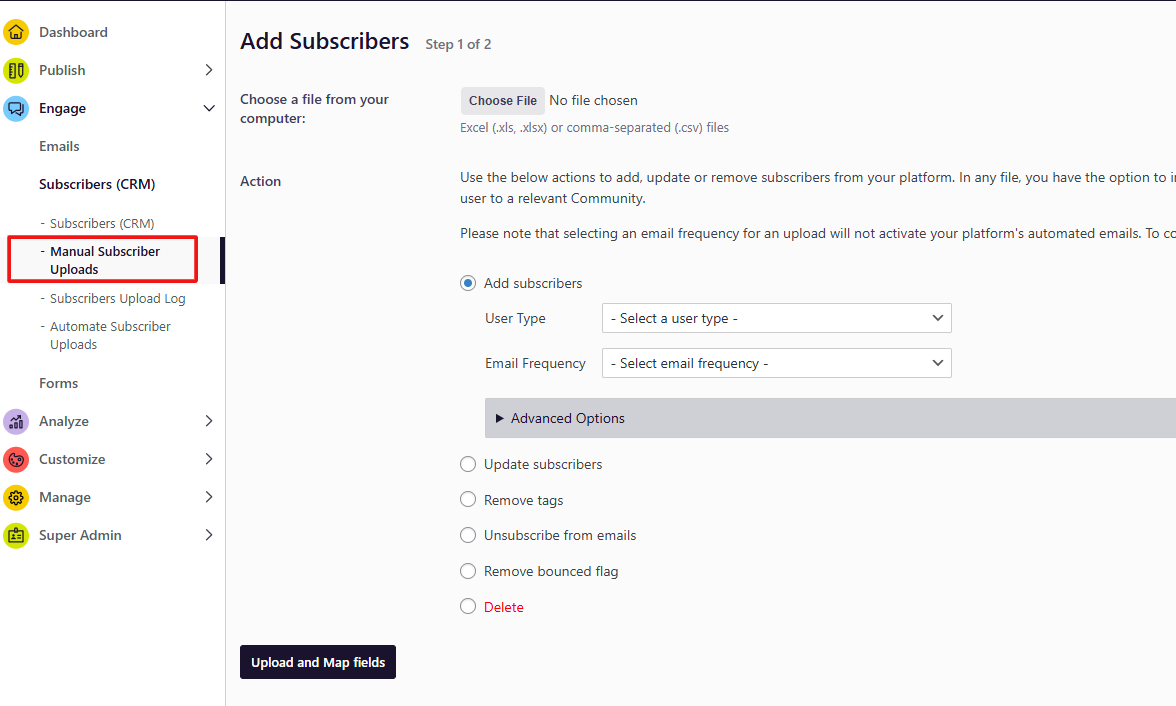
Download your newly built subscriber file as a .xls, .xslsx or .csv file and navigate to Engage > Subscribers > Manual Subscriber Uploads to upload your new file. Learn how to upload your subscriber list here!