Instead of creating an anchor link to a widget section, like a Resources widget, on a page, as this article explains, you may want to create an anchor link to a specific section title or paragraph or even button on your page - not a widget. In this case, you'll want to grab the existing HTML anchor link within the Block Editor content of the page (the "Edit Static Content" button within a Community page).
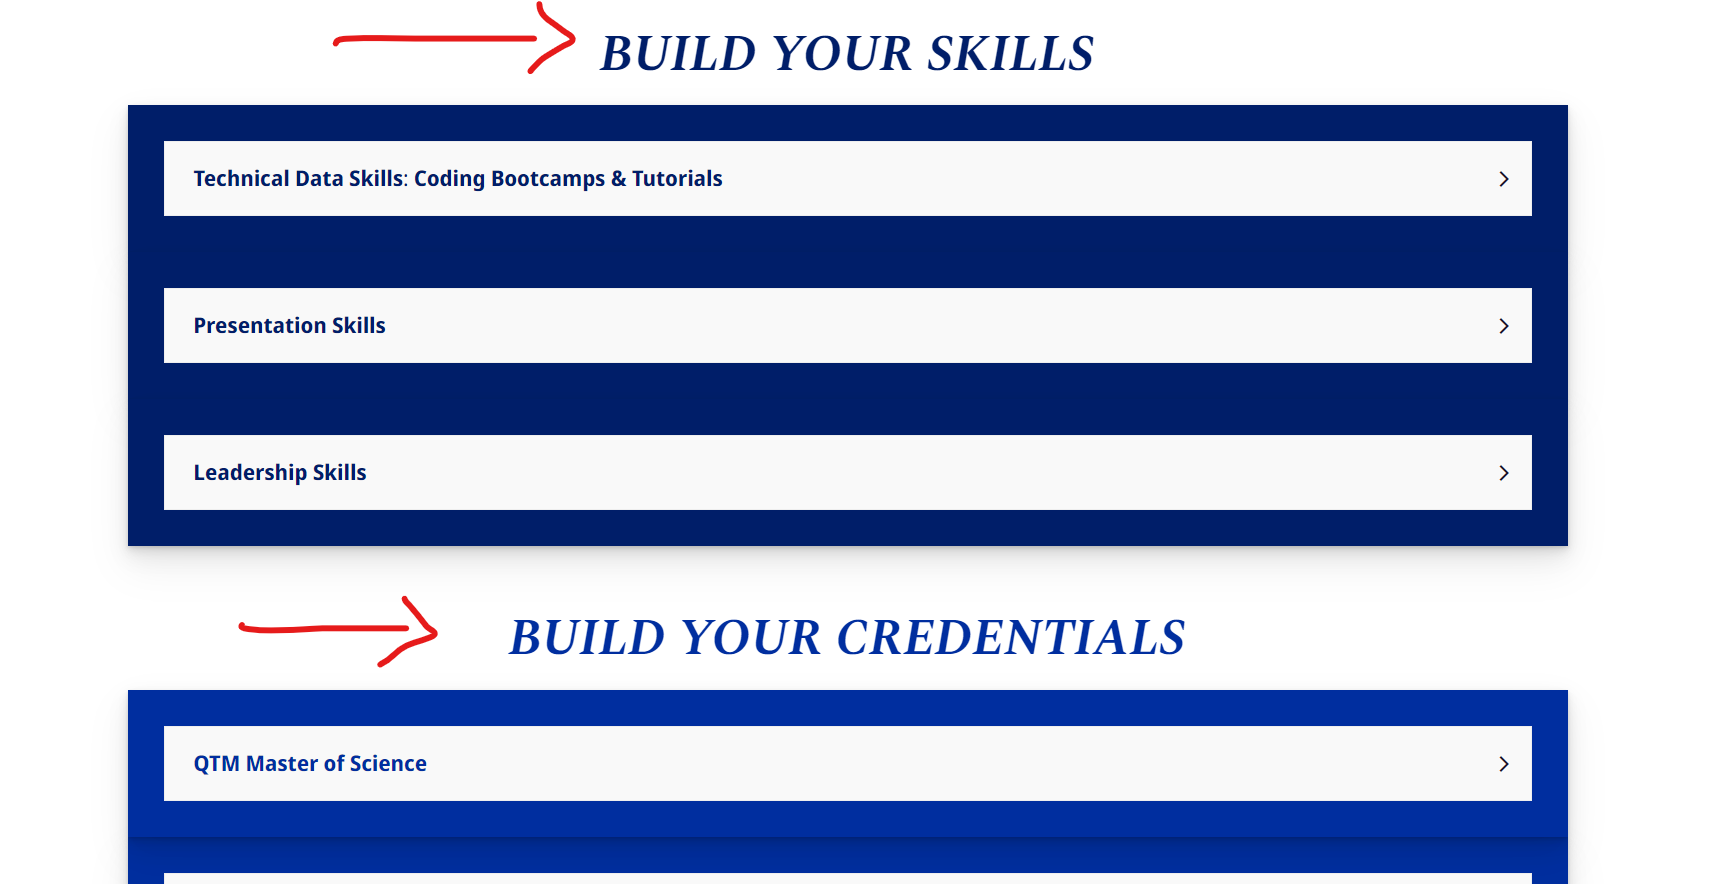
Let's review how to do this, and we'll use this example: I am trying to create an anchor link menu with two buttons; one button will anchor down to the "Build Your Skills" section and the second button will anchor down to the "Build Your Credentials" section:
Step by Step Instructions:
First, find your page (if it's a Community page, it will be under Manage>Communities; if it's a custom page, it will be under Publish>Pages) and click "edit" on the page. We'll use a Community page as an example.
-
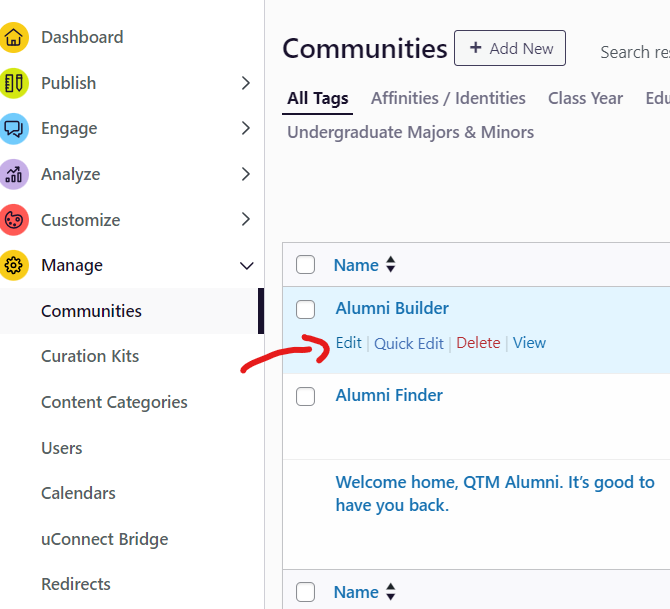
Then, click the "Edit Static Content" button to access the Block Editor content of the Community page.
-

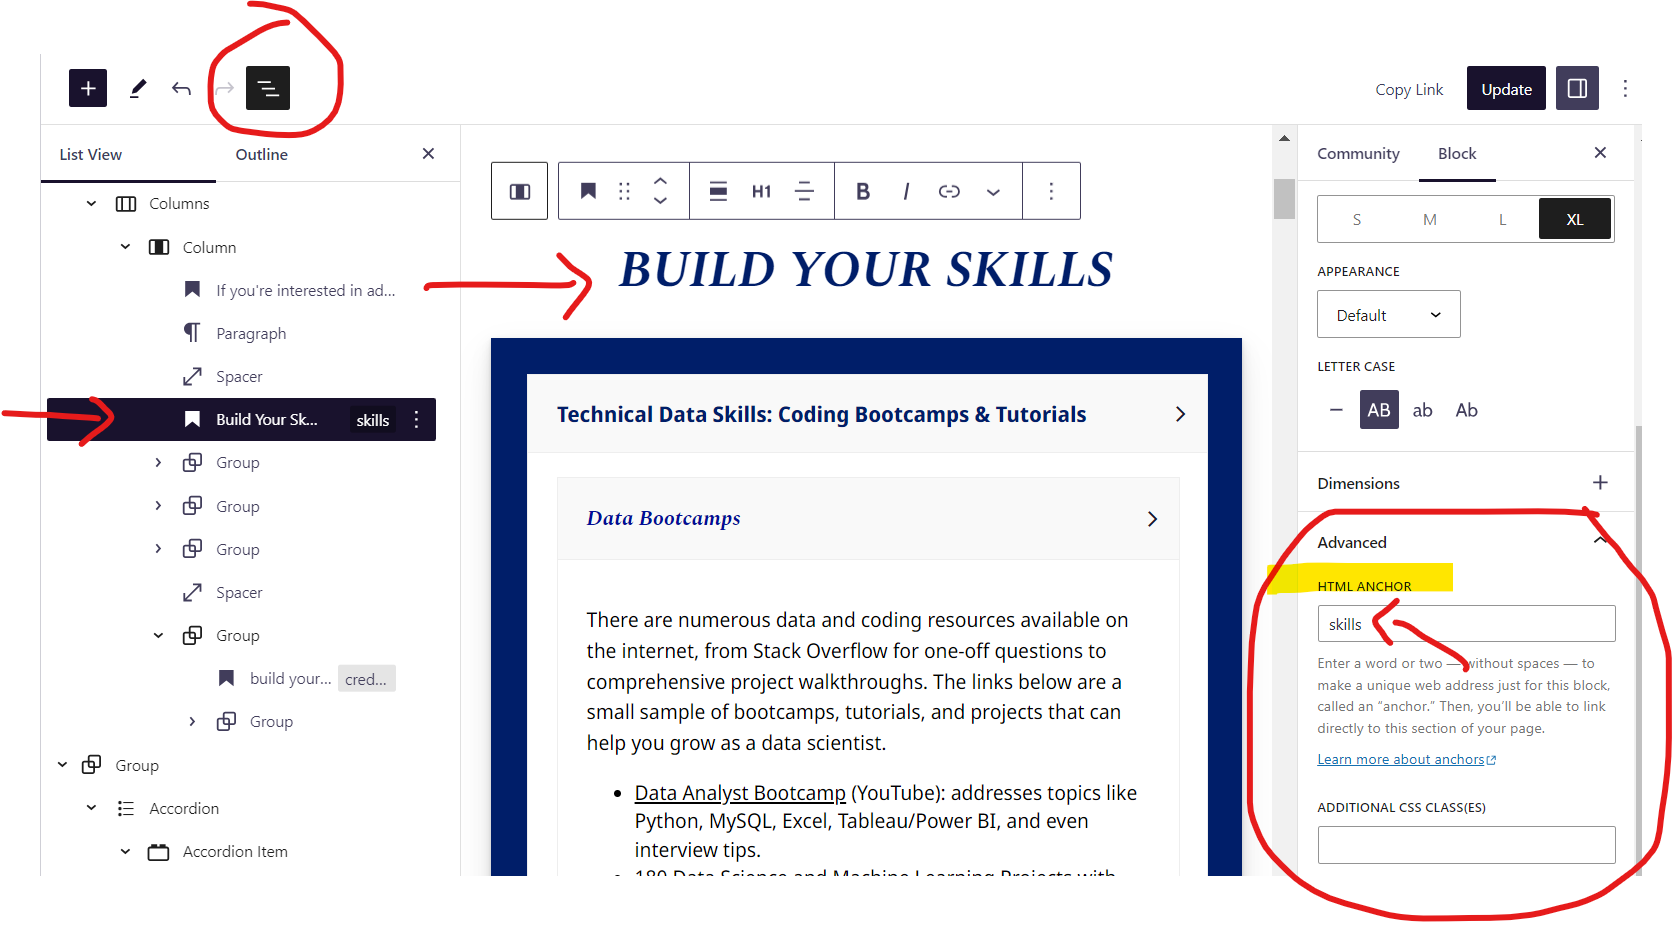
Once you're in the Block Editor, always open up your Document Overview on the left by clicking the 3 small horizontal lines button so you can see all the current blocks that are in use.
Then, find the section heading you are trying to create an anchor link for. Click on that section heading, and then on the right side of your screen, a menu should appear for this heading block specifically.
Within these settings, you should find an "HTML Anchor" section under "Advanced," and you'll see that phrase has already been generated as a anchor link phrase for you. In this example, it's the word "skills" because that word is also in the section head. Highlight and copy this HTML anchor phrase because we're going to paste it in the Menus section next.
-
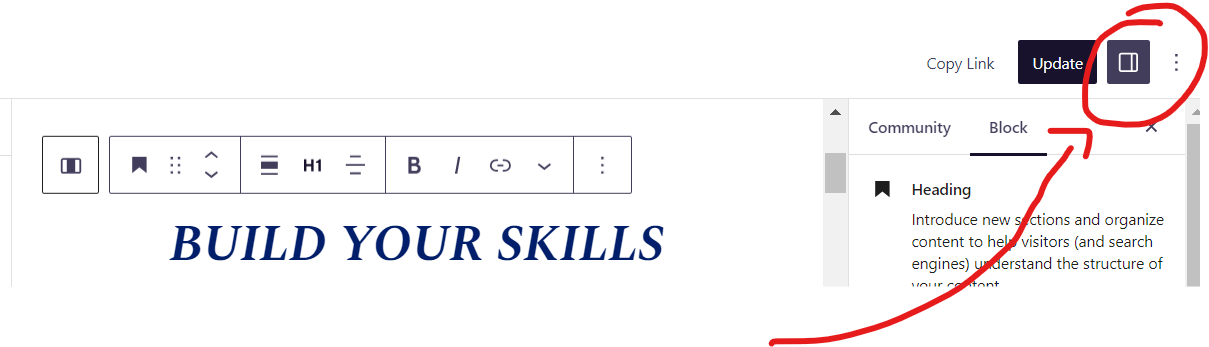
Note: If you don't see the menu/settings on the right side for the "Advanced" and "HTML Anchor" section, try clicking on the small square icon in the top right corner. This will open up the menu settings for that block if they are not already visible:
-
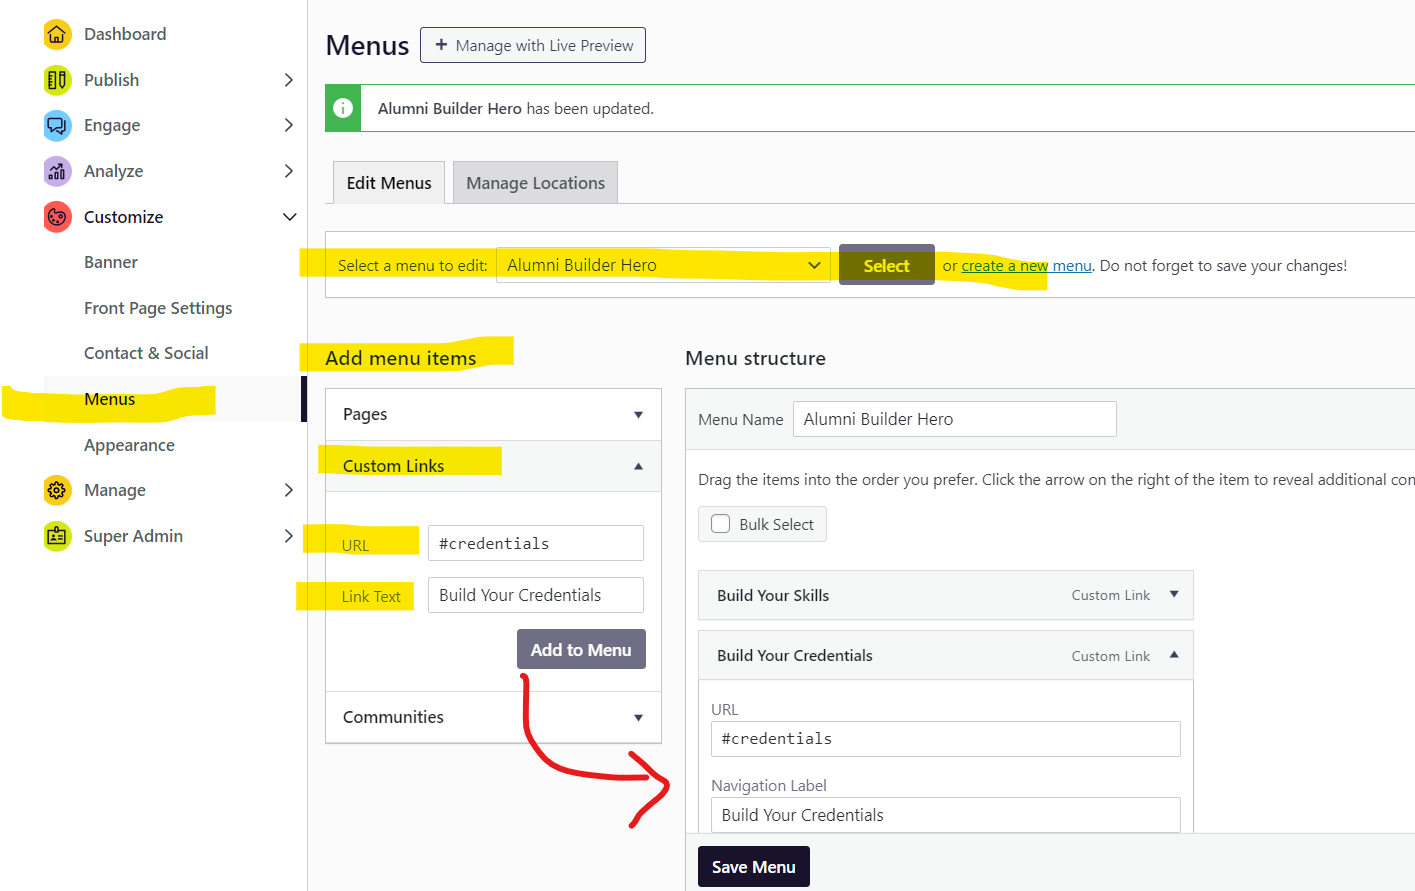
Next, navigate to the Menus section under Customize.
Select your menu that you'd like to edit from the drop-down menu and then hit "Select" (or create a new menu).
Then, click on the Custom Links menu item under "Add Menu Items." In the "URL" field, add the # (hashtag/pound sign) symbol followed by the HTML anchor phrase, which in this example is "skills," so it would appear like this - #skills.
Then, fill in the "Link Text" which will be the name of the button and click "Add to Menu."
Next, under Menu Structure, drag and move the newly-added Custom Link menu item in your preferred menu order and finally click "Save Menu."
Now, repeat these steps for the next section heading.
Once you've done that and added the second HTML anchor link to this menu, your part is complete! The final step in getting your new menu to appear is to reach out to our Support team by submitting a widget request for menu so your menu can appear live on your page.