Your uConnect platform includes three types of menus that help users navigate your content:
Primary Navigation Menu – the main navigation at the top of your platform
Community (Hero) Menus – button-style menus displayed beneath community page banners
Footer Menus – customizable link columns displayed at the bottom of your platform
This article walks you through how to edit footer menus, which are typically used to highlight key links—either mirroring your institution’s website footer or providing customized navigation options for your users.
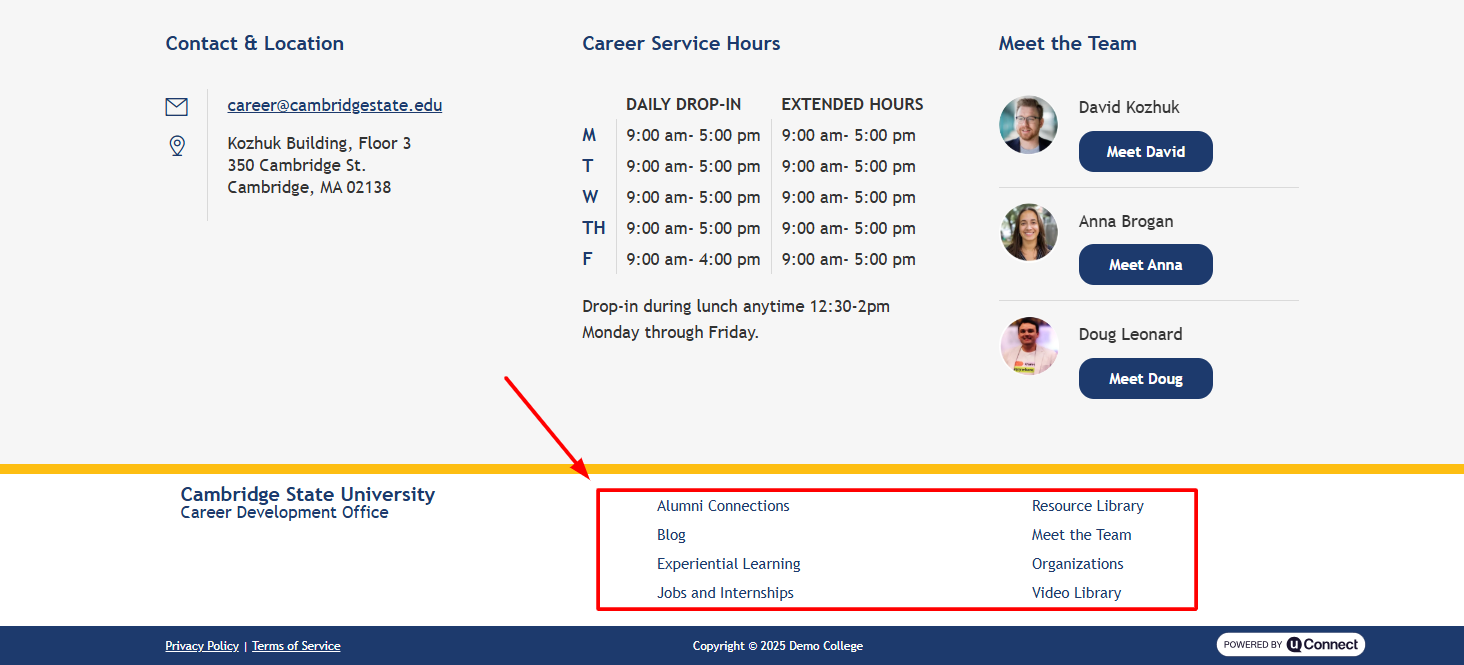
Understanding Footer Menus
Footer menus appear at the bottom of your platform and often include institutional resources, quick links, or student services. Most institutions have at least two footer menus (often labeled Footer Column 1 and Footer Column 2), but you can add more if needed. These menus are fully customizable unless your marketing or communications team has specific branding requirements.
How to Edit an Existing Footer Menu
Follow these steps to modify your footer links:
1. Navigate to Your Menu Editor
Log in to your admin dashboard.
Open the Customize on the left.
Select Menus.
2. Choose the Footer Menu You Want to Edit
In the menu selector at the top, choose the footer column you’d like to update (e.g., Footer Column 1). If you're unsure which is which, click through the menu list until you identify the correct one based on the links it contains.
3. Edit Existing Links
Most footer links are added as custom links, meaning you can easily repurpose them.
To edit a link:
Expand the menu item.
Update the URL field to the new destination.
Update the Navigation Label (the text shown in the footer).
You do not need to delete and recreate a link — editing the existing item works perfectly.
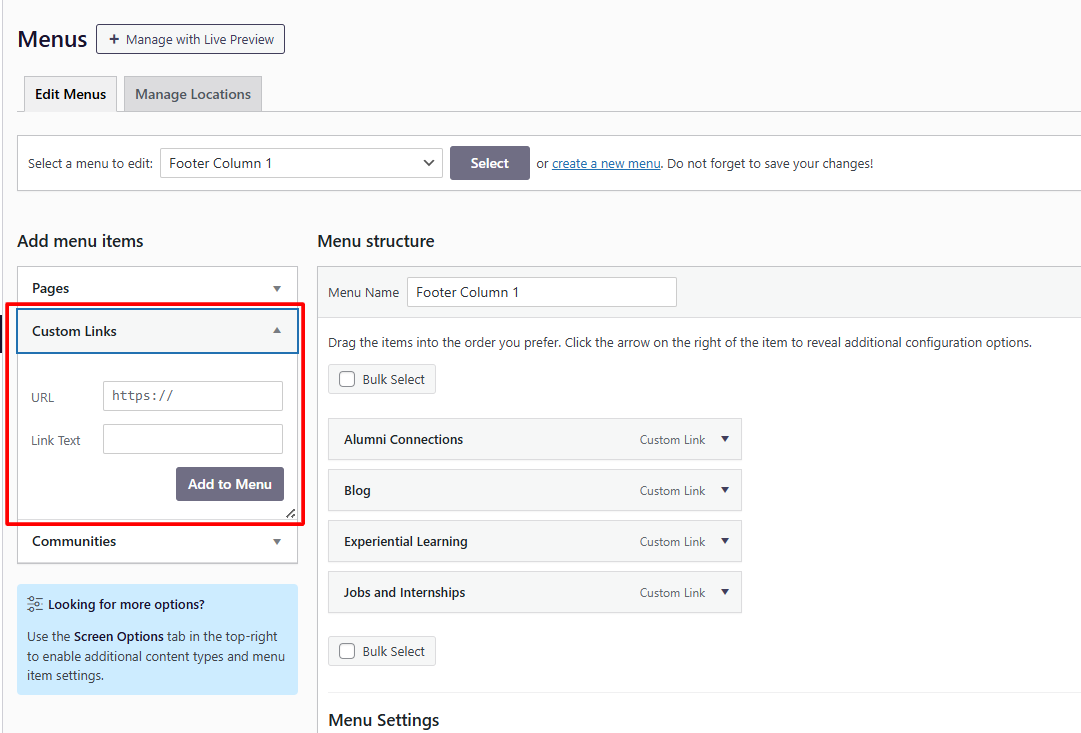
How to Add a New Link to Your Footer Menu
In the left sidebar, under Add menu items, choose Custom link.
Enter the URL you want to link to.
Add the label (the text the user will see).
Click Add to Menu.
Drag and drop the new menu item into your preferred order.
Click Save Menu — footer menus do not auto-save!
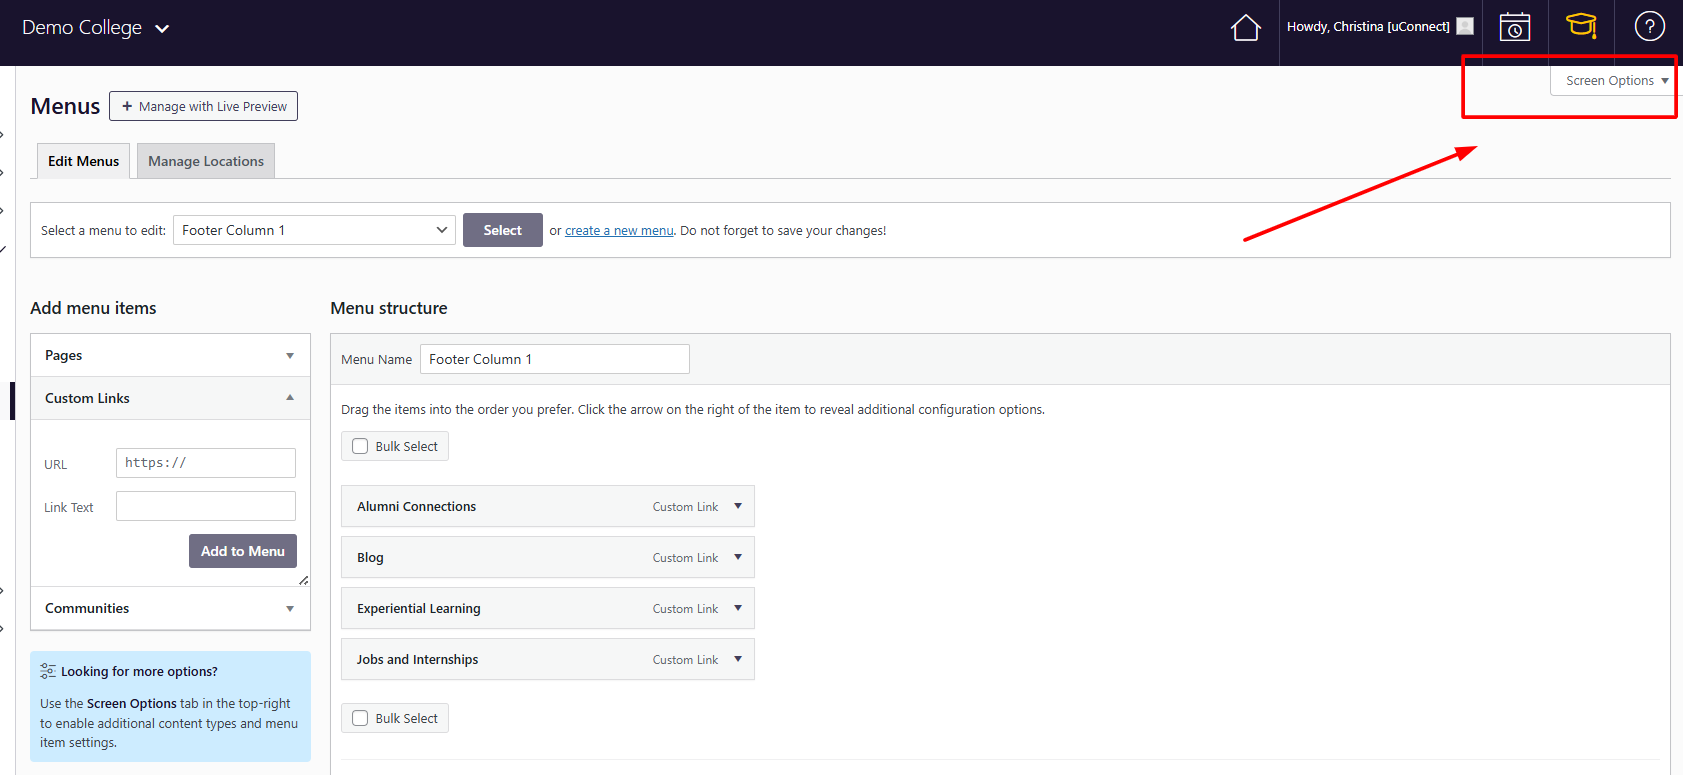
🔎 Don’t see “Custom Link”?
Click Screen Options in the upper-right corner and ensure that Custom Links is checked.
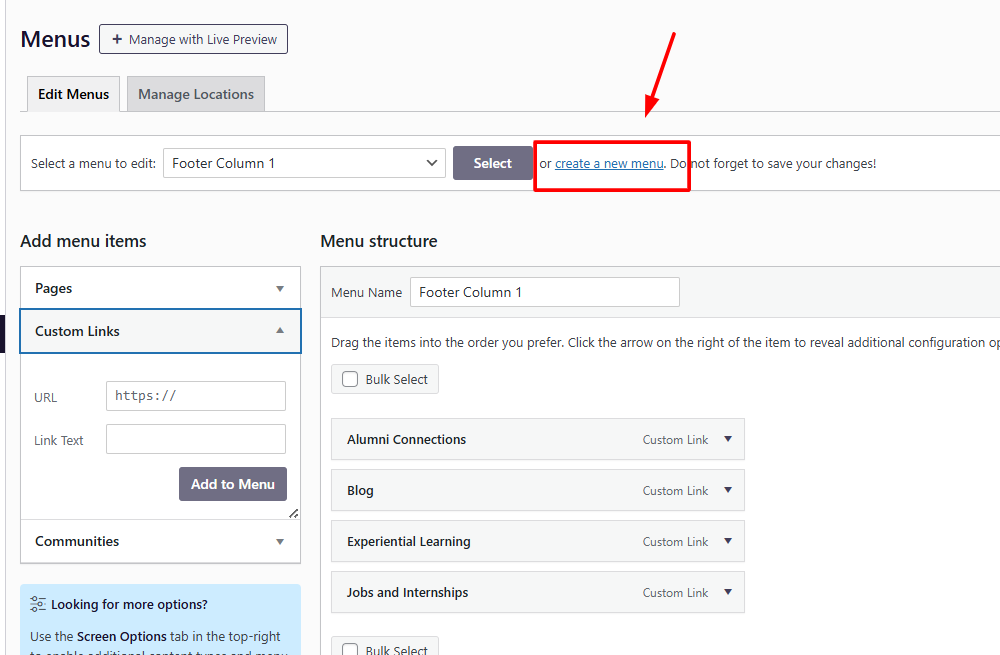
How to Create an Additional Footer Menu
If you’d like to add a new footer column:
Click Create New Menu.
Name your menu (e.g., Footer Column 3).
Click Create Menu.
Begin adding your custom links.
Important: Activating Your New Footer Menu
Creating a new menu in the editor doesn’t automatically display it on your platform. A member of the uConnect team must add a menu widget to enable it on the front end.
To request this:
Go to support.gouconnect.com.
Click Submit a Ticket.
Choose Widget as your ticket type.
Select I want to add a new widget.
In the description, request that the new menu be added as a footer menu widget.
Submit the form.
Our support team will take it from there!
Summary
Editing your footer menus is simple once you know where to look:
Go to Customize → Menus
Select the appropriate footer column
Edit or add links as needed
Save your changes
For new footer menus, submit a support ticket to have the menu widget enabled
With these tools, you can ensure your footer accurately reflects the most important navigation elements for your users. If you need help with a new footer column or want assistance refining your footer layout, our support team is always here to help!